
Upland Wood Flooring repairs, refinishes and installs parquet flooring in Upland, CA, with more than 20 years of experience on wood floors, serving surrounding cities including San Antonio Heights, Claremont, Montclair, Rancho Cucamonga and La Verne. We reset loose tiles, sand and refinish tired parquet, and lay new parquet patterns over properly prepared subfloors.
Parquet behaves differently from strip flooring. Its grain runs in several directions, it is usually glued rather than nailed, and older parquet often sits on adhesive that needs checking before anyone disturbs it. Those differences change how we sand it, how we repair it and how we plan the job.
Much of Upland’s housing went up in the 1960s and 1970s, when parquet squares were a popular choice. Many of those floors are still in place, sometimes under carpet, and a good number can be brought back with the right repairs and a careful refinish.
Repairing Older Parquet Floors
Loose and Lifting Tiles
Parquet tiles come loose when the original adhesive fails. Age is one cause, but moisture from a slab, a leak or a wet mop over the years speeds it up. A loose tile clicks or rocks underfoot, and once a few loosen, neighboring tiles tend to follow.
We lift the loose tiles carefully, number them if needed, and check the slab under them with a moisture meter. Old adhesive is cleaned off the backs of the tiles and the floor, then the tiles are reset in fresh flooring adhesive and weighted while it cures. Resetting before refinishing means the sanding covers a floor that is firmly bonded.
Replacing Damaged Tiles
Pet urine stains, water damage and burns often ruin a few tiles in an otherwise sound floor. We cut those tiles out cleanly and replace them with salvaged or new tiles matched to species, pattern and thickness. Getting the thickness right matters, because a replacement that sits proud or low shows after sanding.
When a perfect match is hard to find, a common approach is to borrow tiles from a closet or under an appliance, where they will not be seen, and place the new tiles there. After the whole floor is sanded and finished together, the repaired area blends into the rest of the room.
Black Mastic and Asbestos Checks
Much vintage parquet was set in black mastic, a dark asphalt-based adhesive, and some of those adhesives contain asbestos. The material is not a hazard while it stays intact and covered. It becomes one when it is sanded, scraped or broken up during removal.
South Coast AQMD Rule 1403 governs asbestos in renovation work in this air basin. When a job would disturb black mastic, whether by lifting tiles or removing the floor, we arrange for testing by a qualified inspector first. We do not sand, scrape or remove suspect material until the result is known and any abatement has been handled properly.
Sanding and Refinishing Parquet
Sanding a Multi-Direction Grain
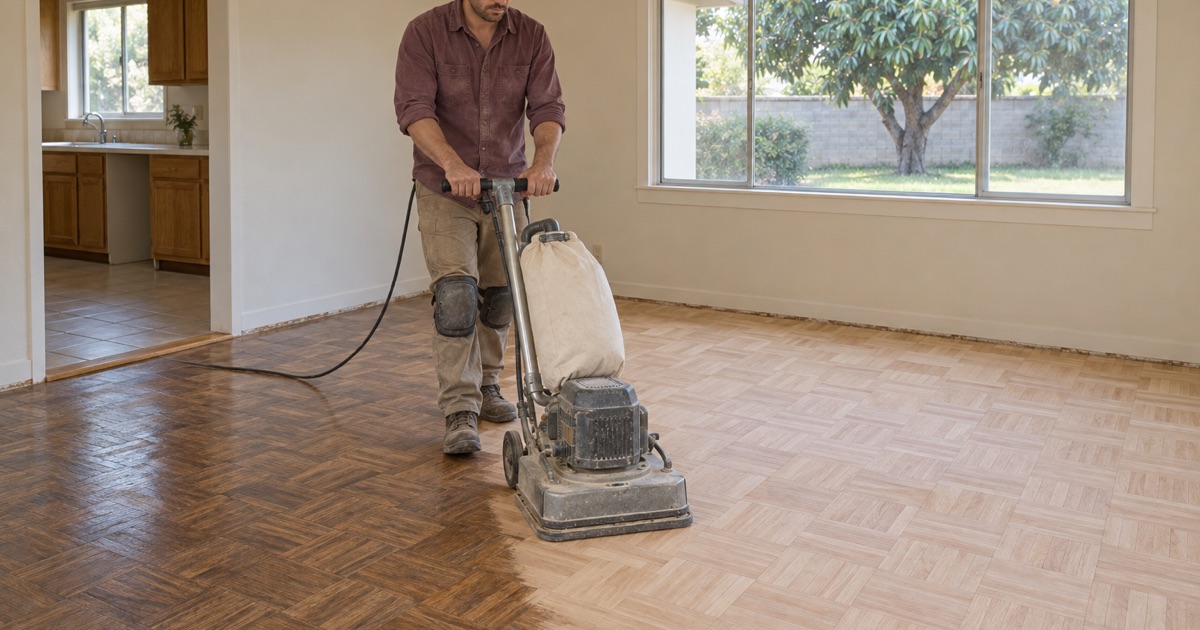
On strip flooring, sanding follows the grain. On parquet, the grain changes direction from block to block, so any sander leaves cross-grain scratches somewhere. We sand parquet at an angle to the pattern, work through a finer grit sequence, and finish with an orbital sander or buffer to remove swirl marks.
Parquet is often thinner than solid strip flooring, and older floors may have been sanded before. We check the remaining thickness before starting and keep each pass as light as the damage allows. The aim is a flat, clean surface without cutting through the wear surface of any block.
Fill, Stain and Finish
Parquet has many joints, and small gaps between blocks are common in older floors. We trowel fill the whole floor where needed so the gaps close and the finish lies smooth. The filler is chosen to match the wood color, whether the floor is going to stay natural or be stained.
Because the grain runs in different directions, stain can look darker on some blocks than others. We test floor stain samples on your sanded floor before committing. Many owners choose a clear finish instead, which shows the pattern best and avoids uneven color entirely.
Finishes and Sheen
For the final coats, we use waterborne polyurethane, oil-modified polyurethane or hardwax oil, each chosen to meet South Coast AQMD Rule 1113 for wood coatings. Waterborne finishes keep the wood light, while oil-modified finishes warm the color and bring out the contrast between blocks.
Sheen level makes a visible difference on parquet. A matte or satin finish softens the pattern and hides wear, while a higher gloss highlights the geometry but shows scratches. We show you samples in the room so the decision is based on your own floor and light.
Installing New Parquet
Choosing a Pattern and Species
New parquet comes in classic squares, basket weave, and pattern designs such as herringbone and chevron. White oak and red oak are the most common species, with other hardwoods available for a different color or hardness. Solid parquet can be sanded again in the future, while some engineered parquet products have a thinner sandable layer.
We help you weigh the look against the practical choices: block size, species, finish and whether to install prefinished or site-finished blocks. Site-finished parquet is sanded flat after installation, which gives a smooth surface across every joint and allows a custom stain color.
Preparing the Slab or Subfloor
Parquet is usually glued down, so the surface under it has to be flat, clean and dry. On a concrete slab, we test moisture with in-situ relative humidity testing or a calcium chloride test and write the reading down. If it reads too wet, a moisture membrane or more drying time comes before any adhesive.
Over a wood subfloor, we check the plywood or OSB for soft spots and loose fasteners. Old flooring, tack strip and adhesive residue are removed, high spots are sanded and low spots filled. Parquet shows every dip in the surface under it, so preparation takes as long as the installation itself in many rooms.
Layout and Installation
A parquet floor starts from a layout line, usually set from the center of the room or a main sight line, so the pattern looks square to the walls. We dry-lay sections to check the layout before spreading adhesive, then set each block into urethane flooring adhesive.
An expansion gap is left at the walls and covered with baseboard or quarter round. Where parquet meets tile, carpet or another wood floor, a reducer or T-molding makes a clean transition. Once the adhesive has cured, site-finished parquet is sanded and coated, and we leave a written cure schedule for the household.
Living With a Parquet Floor
Parquet Found Under Carpet
In houses from the 1960s and 1970s, parquet squares were often covered with wall-to-wall carpet in a later remodel. When the carpet comes up, the parquet underneath is usually protected from sun and traffic, though it carries tack strip holes around the edges and pad residue across the surface.
We pull the tack strip and staples, scrape off the pad, and check every area for loose tiles before any sanding. Tack strip holes along the walls are filled or covered by new baseboard. A floor that has spent decades under carpet often turns out to be one of the better-preserved rooms in the house.
Everyday Care and Recoating
Parquet lasts longest with gentle cleaning: a soft broom or vacuum, a pH-neutral wood floor cleaner and felt pads under furniture. Standing water is the main enemy, because it reaches the adhesive through the many joints between blocks and loosens tiles from below.
When the finish dulls but the wood is still sound, a screen and recoat restores the surface without sanding into the blocks. Catching wear at that stage saves wood for the future, which matters on thinner parquet. We can schedule a recoat on a floor we refinished, or on one we are seeing for the first time.
- 20+ Years in Wood Floors
- Build Year Checked First
- Written Cure Schedules